VITA Zahnfabrik
H. Rauter GmbH & Co. KG
Spitalgasse 3
79713 Bad Säckingen

CAD/CAM veneers made of highly stable glass ceramic with a lifelike play of shade and light
Extensive esthetic reconstructions in the front require extensive planning and active involvement of patients to achieve a result that satisfies both esthetic principles and patient expectations. Using the example of a veneer restoration, Dr. Stas Belous shows how he simulated the desired result step-by-step, using digital smile design and an analog mock-up, and then efficiently implemented it in the digital workflow. In this case, he decided in favor of the zirconia-reinforced lithium silicate glass ceramic VITA SUPRINITY PC (VITA Zahnfabrik, Bad Säckingen, Germany). Due to its excellent light-optical properties, this material enables predictable, highly esthetic results with minimal time.
1. Findings and patient expectations
A 33-year-old female patient with dental anxiety was dissatisfied with the esthetic appearance of her upper front teeth. The assessment showed a gap between the lateral and central incisors and a fractured incisal edge on tooth 21. The patient refused orthodontic pre-treatment in combination with bleaching. She wanted a time-efficient, highly esthetic solution with the most minimally invasive approach possible. The decision was made for the CAD/CAM-based production of veneers made of VITA SUPRINITY PC glass ceramic.
2. Comprehensive digital and analog planning phase
For prosthetic planning in dialog with the patient, the patient’s face and esthetic zone were scanned using the Bellus3D Dental Pro smartphone app (Bellus3D, Campbell, California, USA). The morphology was subsequently transferred to the exocad software (exocad, Darmstadt, Germany). An idealized model could be printed based on the data record. An intraoral mock-up was created using a silicone key and temporary composite and discussed with the patient. This was used to make morphological corrections in the exocad software, and a printed model was used to create another intraoral mock-up that was approved by the patient and the practitioner. This result was subsequently scanned.
3. Digital shade determination and CAM production
The digital workflow was managed with the MyCrown System (FONA-Dental, Bratislava, Slovakia). After local anesthesia, the VITA Easyshade V (VITA Zahnfabrik, Bad Säckingen, Germany) was used to digitally determine tooth shade 2R1.5. This was followed by a mock-up preparation from tooth 13 to 23 in order to work as minimally invasively as possible. In a first step, deep grooves were created that provided orientation during the preparation. The situation was rescanned and the mock-up scan transferred to the new situation to construct the veneers according to the patient’s request. For the blank selection, a lighter shade (1M2 T) was chosen, with the goal of later controlling the chroma of the restoration in a targeted manner via the shade of the composite cement.
4. Efficient finalization and esthetic final result
This was followed by the fabrication of the veneers with the grinding unit MyCrown Mill, the manual processing and the crystallization firing. The patient-specific characterization and glazing of the veneers were performed with the VITA AKZENT Plus stain and glaze system. After the try-in with glycerine gel and the final fixation, the patient was pleased with the highly esthetic result. Detailed planning and the consistent involvement of the patient in all planning steps, combined with the outstanding light-optical properties of the glass ceramic veneers made of VITA SUPRINITY PC, reliably led to the successful treatment.
Report 07/19
Dr. Stas Belous, Moskau, Russia
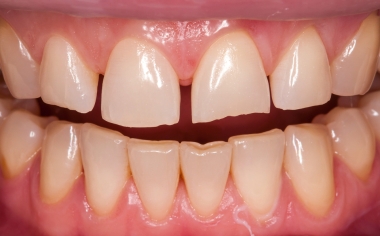
Fig. 1: The initial situation with diastemata and incisal edge fracture on tooth 21.
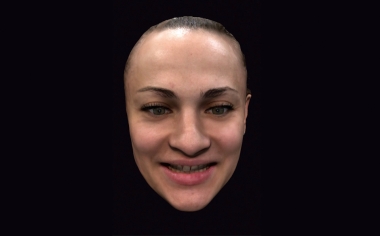
Fig. 2: A facial scan with the smartphone app enabled initial virtual planning together with the patient.
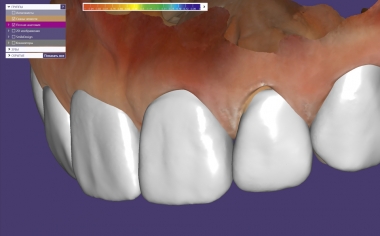
Fig. 3: The virtual smile design helped design a digital mock-up in the exocad software.
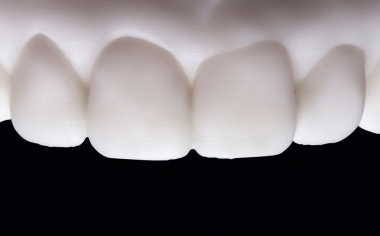
Fig. 4: A model incorporating the desired conditions was printed from the data record of the digital mock-up.
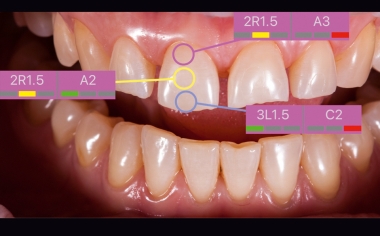
Fig. 5: Before preparation, the basic tooth shade was determined precisely and quickly with the VITA Easyshade V.
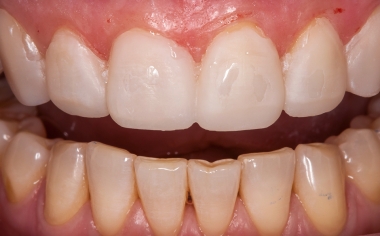
Fig. 6: The mock-up model was transferred intraorally with a silicone key and temporary composite.
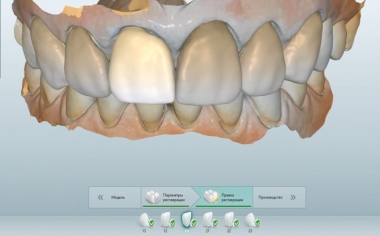
Fig. 7: The intraoral mock-up was scanned with the MyCrown System.
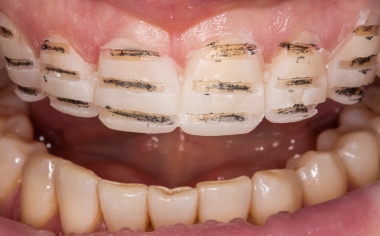
Fig. 8: Initially, deep grooves of 0.8 mm were incorporated into the mock-up and marked in pencil.
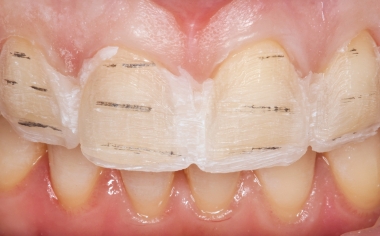
Fig. 9: This enabled a controlled and minimally invasive preparation.
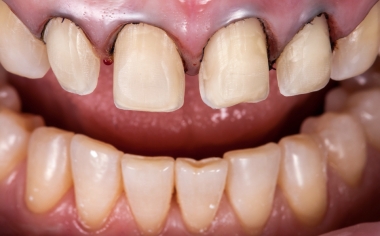
Fig. 10: Retraction threads were inserted into the sulcus for a smooth optical scan.
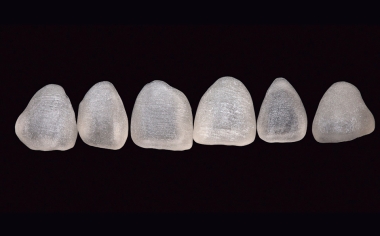
Fig. 11: The zirconia-reinforced lithium silicate ceramic VITA SUPRINITY PC can be ground very precisely, due to its fine grain.
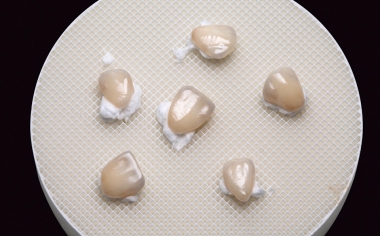
Fig. 12: Characterization and glaze were done with the VITA AKZENT Plus stain system.
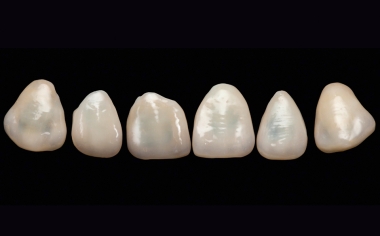
Fig. 13: Even before the try-in, the finished veneer restorations appeared absolutely natural.
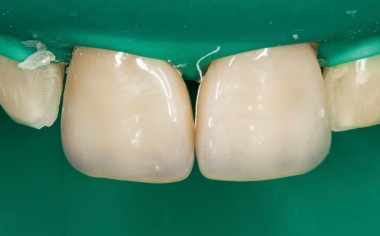
Fig. 14: After conditioning with hydrofluoric acid and silane, the veneers could be integrated with full adhesion.
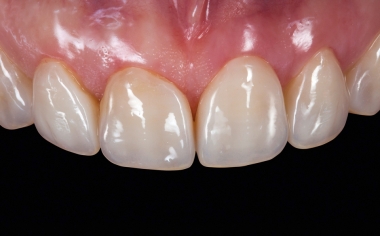
Fig. 15: The veneers blend into the natural dental arches.
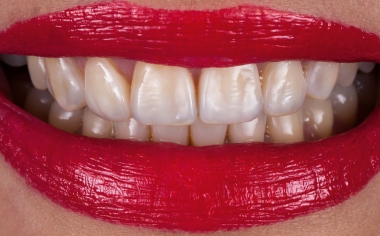
Fig. 16: The result is convincing in shape, shade and light dynamics.