VITA Zahnfabrik
H. Rauter GmbH & Co. KG
Spitalgasse 3
79713 Bad Säckingen

Individually layered veneer restorations with excellent light dynamics
For cosmetic veneer reconstructions in the front, an intensive dialog with patients during the planning phase is a key factor in the success of treatment. A wax-up and mock-up help to purposefully and efficiently simulate the desired morphological target situation. Furthermore, the mock-up supports the practitioner with minimally invasive preparation. The patient-specific production of veneers using a veneering technique on refractory stumps enables an extremely natural and lively result. However, this requires a veneering ceramic system with which chromacy, translucency, opalescence and fluorescence can be specifically controlled. In the following case study, dental technician Marcio Breda demonstrates the production of highly individualized veneers with excellent light dynamics using VITA VMK Master veneering ceramics (VITA Zahnfabrik, Bad Säckingen, Germany).
1. Initial clinical situation
A 38-year-old female patient was dissatisfied with the esthetic appearance of her front teeth in the upper jaw and presented at the dental office of Dr. Rafael Ballista. After multiple filling treatments with composite, the upper front jaw appeared lifeless and structureless. The incisal edge progression ran in a line from tooth 13 to 23, which looked unnatural. The central incisors had a different length-to-width ratio. When she smiled, it was noticeable that her buccal corridor was too pronounced on both sides, which made her upper jaw seem too small in relation to the width of her mouth. After detailed consultation, the patient opted for a rehabilitation of the esthetic zone with veneers made from VITA VMK Master veneering ceramic, applied individually to refractory stumps.
2. Planning phase and preparation
After the impression, situation models were prepared and articulated in habitual intercuspation. This was followed by an esthetic wax-up in the upper jaw, which was transferred into the patient's mouth with a silicone key and temporary crown and bridge material. To fill out the buccal corridor more, this extended from tooth 16 to tooth 24. After a few details were added and subtracted in dialog with the patient, a pickup impression was taken of the situation. After local anesthesia, a guided mock-up preparation followed to provide the patient with non-invasive or minimally invasive treatment in the enamel area. An impression was taken of the upper jaw, and a master model was created on this basis, with refractory stumps on the relevant teeth.
3. Highly individual veneer layering
For initial layering, VITA VMK Master DENTINE A1 was used in the cervical area, and DENTINE A1 and neutral TRANSLUCENT 4 (T4) were used in the incisal area. After the firing, DENTINE A1 was layered over the entire surface and a cutback was carried out. In the mamelon area, shade-intensive DENTINE MODIFIER 2 (cream) and whitish T1 were subsequently layered over the DENTINE A1 in a three-to-one mixture. Work was done with light blue T5 and gray T7 in the incisal area, as well as with a two-to-one mixture of whitish ENAMEL 1 and neutral T4 in the central area, and the result was fired. In a next step, a balanced mixture of neutral WINDOW, T4 and opalescent 0PAL TRANSLUCENT 1 was created over the complete surface. To integrate a halo effect, DENTINE A2 was applied to the incisal edge. Finally, PLT1 (pearlescent cream) was layered laterally and centrally to precisely lighten the dentine body.
4. Final integration and final result
After the final firing, the eleven veneers were carefully finalized and polished. In the clinical try-in with glycerine gel, the patient was immediately enthusiastic about her new appearance, so a rubber dam was created and the conditioning of the restorations with hydrofluoric acid and silane started. After the vestibular enamel of the teeth was successively etched with phosphoric acid, the adhesive CLEARFIL SE BOND was applied (Kuraray Noritake, Tokyo, Japan), and beginning with the second quadrant, one veneer after the other was integrated with composite cement. The result was a highly esthetic restoration and a very happy patient. The veneers had an absolutely natural effect and were convincing with their balanced play of shade and light.
Report 07/19
Marcio Breda, Vitória, Espírito Santo, Brazil

Fig. 1: The initial situation of a patient with a pronounced buccal corridor.
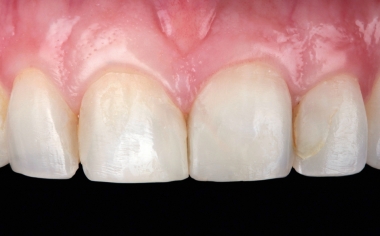
Fig. 2: The front of the upper jaw, restored with composite, looked lifeless and unnatural.
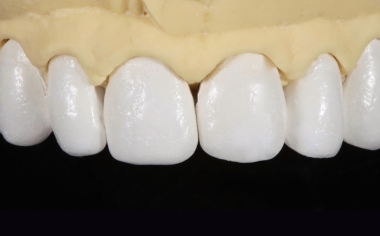
Fig. 3: The master model with refractory stumps and anatomically reduced veneers after dentine firing.
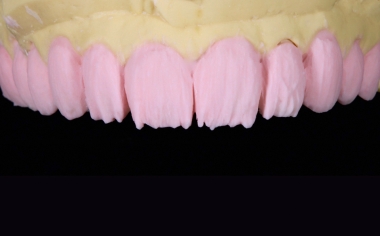
Fig. 4: The cut-back after the application of DENTINE A1 over the entire surface.
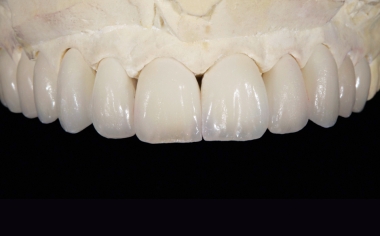
Fig. 5: The intermediate result after the second firing on the master model.
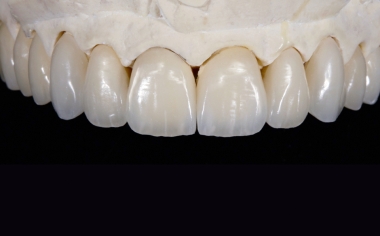
Fig. 6: The final result after the third firing, finalization and polishing.
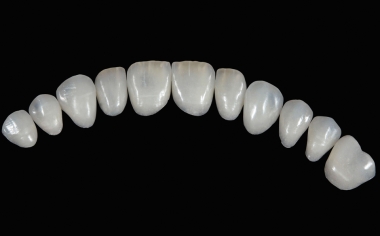
Fig. 7: The eleven veneers in rank and file before the adhesive attachment.
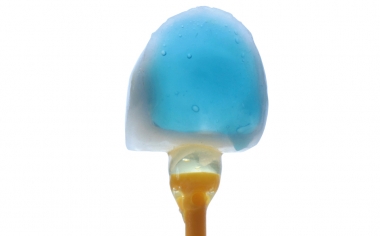
Fig. 8: The etching of the inner surface of the veneer with hydrofluoric acid.
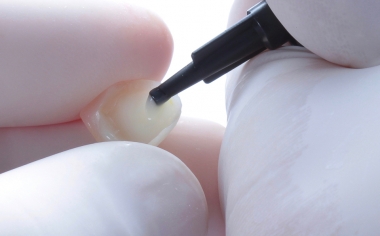
Fig. 9: The application of the composite cement to the inner surface of the veneer.
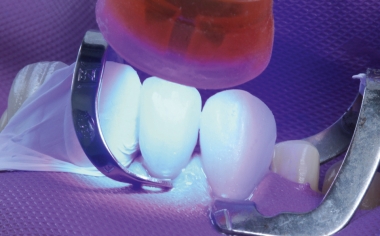
Fig. 10: The veneers were inserted and light-cured one after the other.
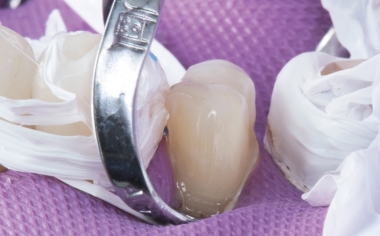
Fig. 11: The conditioned, minimally invasive preparation on tooth 14.
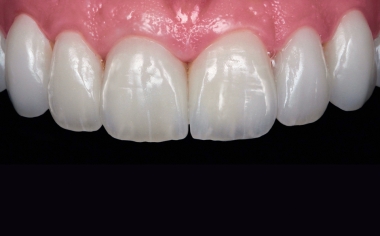
Fig. 12: The veneers appeared absolutely natural after the final integration.
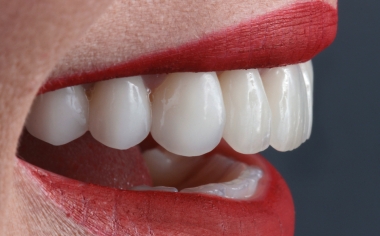
Fig. 13: The highly esthetic restoration viewed from the side.

Fig. 14: The patient was visibly happy about the successful final result.