VITA Zahnfabrik
H. Rauter GmbH & Co. KG
Spitalgasse 3
79713 Bad Säckingen

Defect-oriented, CAD/CAM-fabricated endocrown restoration with polychrome hybrid ceramic
Using endocrowns to restore deeply damaged teeth that have undergone root canal treatment is a defect-oriented and minimally invasive procedure. In contrast to full crown preparations, tooth substance preservation is a top priority for endocrowns. However, in these kinds of cases, this requires CAD/ CAM materials such as the biomimetic hybrid ceramic material VITA ENAMIC (VITA Zahnfabrik, Bad Säckingen, Germany), that allow for extremely delicate reconstructions with minimum wall thicknesses and material properties that exhibit tooth-like behavior. In the following case, the hybrid ceramic was also selected because its high edge stability allows it to be processed precisely with CAM technology, and it ensures a secure adhesive attachment, according to the proven all-ceramic protocol. Dentist Dr. Oxana Naidyonova shows her step-by-step procedure in the following case study.
1. The patient case
A 28-year-old male patient visited the clinic after an endodontic treatment and filling therapy on tooth 24, due to consistent food remnants in the distal proximal space that were difficult to remove and often led to local inflammation. The clinical evaluation found that the filling restoration (OD) was insufficient. The X-ray check showed nothing out of the ordinary. The patient opted for a new, time-efficient CAD/CAM-supported restoration. VITA ENAMIC multiColor polychrome was selected for the reconstruction. This CAD/CAM blank has an integrated shade and translucency gradient, and a natural play of colors and light that can be conveniently reproduced at the push of a button.
2. Clinical steps
Before the preparation, the tooth shade 2M2 was determined using the VITA Toothguide 3D-MASTER (VITA Zahnfabrik, Bad Säckingen, Germany), and the appropriate blank in the shade 2M2 was selected. After local anesthesia was applied, the composite filling was removed. And after full-adhesive conditioning, all undercuts were evened out with a low-viscosity composite. The remaining cavity walls were only reduced with a shoulder preparation. This was followed by the insertion of a retraction thread, as well as a gingivectomy of the enlarged and inflamed gum areas on the distal box so that an optical scan could be used to detect all relevant areas.
3. CAD construction and CAM fabrication
After the CAD design was complete, the restoration could be positioned in the virtual VITA ENAMIC multiColor blank with its six finely nuanced layers, so that the translucency and shade gradient corresponded to the clinical situation. This was followed by fabrication using the MyCrown Mill grinding unit (FONA Dental, Bratislava, Slovakia). After the restoration was finished with fine diamonds, the fissures were conditioned with hydrofluoric acid (5%) and silane in order to characterize them with lightcuring composite stains. The final step was the high-gloss polish.
4. Full-adhesive seating and final result
A rubber dam was created for the fully adhesive seating in order to prevent contamination, and to ensure absolute dryness and a sustainable bond. The adhesive surfaces of the restoration were conditioned using hydrofluoric acid (5%) and silane. In order to create a retentive etching pattern on the enamel areas and to prepare the dentin for the adhesive bond, the cavity was etched with phosphoric acid and then an adhesive was applied. For bonding, the composite Micerium (Micerium, Avegno, Italy) in the shade HRI was heated to give it a lower viscosity for insertion. Lastly, light curing and removal of the composite residues followed. As a result, the polychrome hybrid ceramic restoration was integrated harmoniously into the natural tooth structure, producing very esthetic results. The follow-up appointment three months later showed a healed and inflammation-free gingiva around the restoration.
Report 04/20
Dentist Dr. Oxana Naidyonova
Karaganda, Kazakhstan
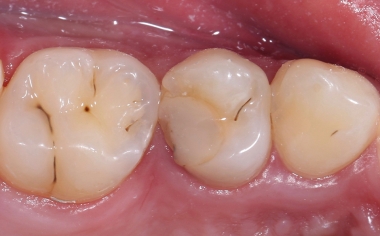
Fig. 1 The insufficient composite filling on tooth 14 (OD) had led to inflammations in the interdental space.
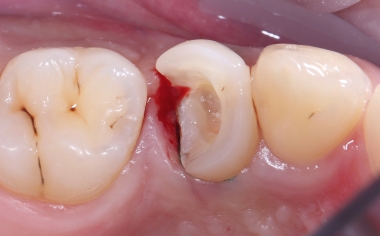
Fig. 2 After removal of the old composite filling, an inflammatory bleeding of the gingiva appeared on the proximal box.
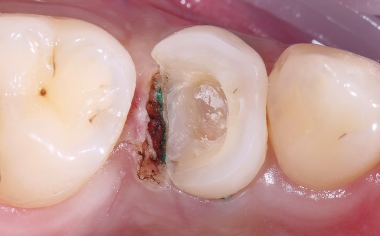
Fig. 3 To stop the bleeding and make all areas visible, a distal gingivectomy was performed and a retraction thread was inserted.
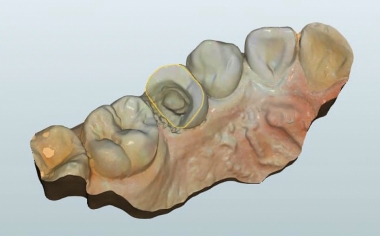
Fig. 4 Based on the intraoral scan, a virtual model was created for the construction.
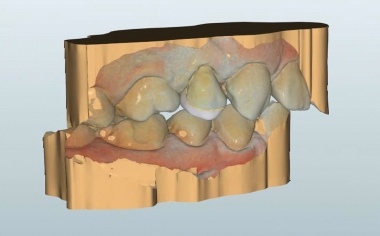
Fig. 5 The finished virtual design of the endocrown restoration in the vestibular view.
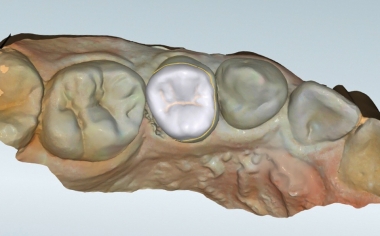
Fig. 6 The virtual design in occlusal view before nesting in the virtual block.
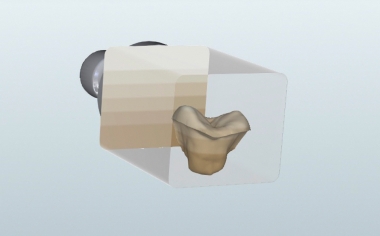
Fig. 7 Thanks to six finely nuanced layers, the shade and translucency gradient of the restoration could be controlled with the positioning.
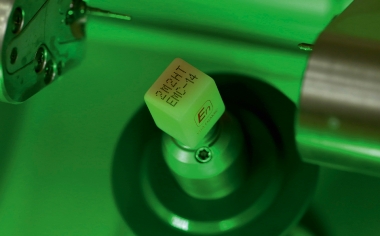
Fig. 8 The highly translucent, hybrid ceramic block in the color 2M2 clamped in the grinding machine.
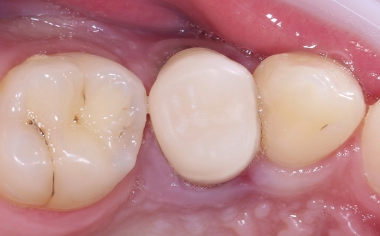
Fig. 9 The CAD/CAM-supported restoration after the preparation at the clinical try-in.
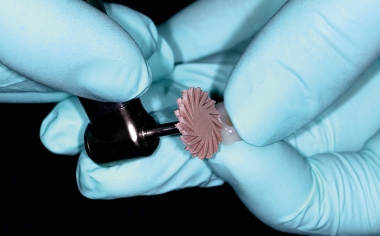
Fig. 10 The finished hybrid ceramic crown was then polished to a high gloss.
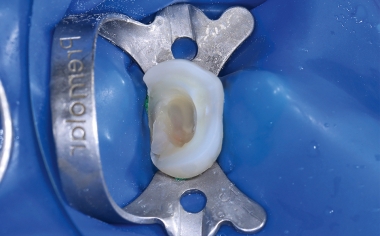
Fig. 11 Under the rubber dam, the fully adhesive seating began with phosphoric acid etching of the cavity.
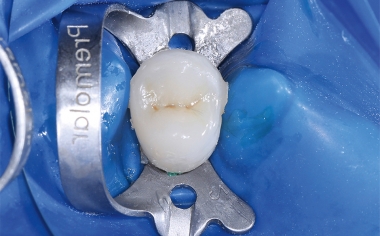
Fig. 12 Condition immediately after full-adhesive seating, before removal of the cement residues.
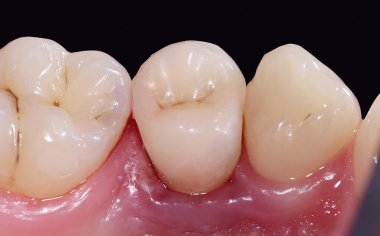
Fig. 13 Immediately after the final seating, the gingiva was still irritated and inflamed.
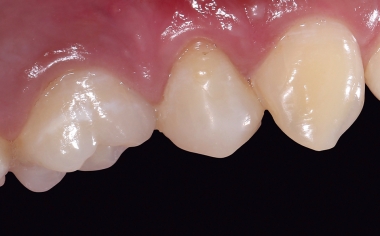
Fig. 14 During the follow-up after three months, healthy gingival conditions appeared.
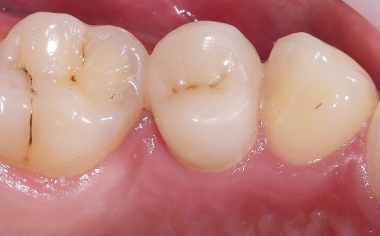
RESULT Thanks to the very good light-optical properties, the reconstruction made of VITA ENAMIC multiColor integrated perfectly into the natural tooth substance.