VITA Zahnfabrik
H. Rauter GmbH & Co. KG
Spitalgasse 3
79713 Bad Säckingen

Intelligent layering concept for a true-to-life result in the front
Achieving true-to-life results in the front requires creative and intelligent concepts. A patient-specific layering has to reproduce the special characteristics of the neighboring teeth, as well as the natural shade and light play in all its facets. The light must be resorbed, reflected or refracted analogously to the natural dentition in the corresponding restoration areas. The VITA VM 9 veneering ceramic (VITA Zahnfabrik, Bad Säckingen, Germany) offers a wide range of dentin, enamel and effect compounds for high-precision reproduction of natural light dynamics. With this, dental technicians have the greatest possible scope of materials for producing lifelike reconstructions. In the following interview, the dental technician Marcio Breda explains his layer concept for brilliant anterior crowns.
DV: How long have you been working with VITA VM 9, and why did you choose this veneering ceramic?
Marcio Breda: I have been successfully using this system since the launch of VITA VM 9 in 2004. What really impressed me from the beginning is the special lifelike quality that I can achieve with this ceramic material. Intraorally, the ceramic restorations made of VITA VM 9 are absolutely natural.
DV: Essentially, what did you do in the present case, and which ceramic compounds did you primarily use?
Marcio Breda: In this case, I applied several EFFECT LINERS to the framework in the first step and then reproduced the base shade with BASE DENTINE. Afterwards I applied various translucent and fluorescent enamels for the incisal area. For even more natural lifelike esthetics, I finally used effect compounds such as NEUTRAL, WINDOW, and EFFECT PEARL. For an even greater natural appearance, I used effect compounds such as NEUTRAL, WINDOW and EFFECT PEARL.
DV: For the cervical area of the crowns, opaque ceramic materials were used. What was your goal in using these materials here?
Marcio Breda: As with natural dentition, I wanted to achieve high chromacity for the cervical area. That’s why I applied the yellow EFFECT LINER 4 here before applying BASE DENTINE. This gives me an intense, stable shade effect in the base shade.
DV: For true-to-nature light dynamics, you also need fluorescence, among other things. Which VITA VM 9 compounds do you prefer to use, and in which crown area?
Marcio Breda: As already mentioned, in the context of the first dentine firing in the cervical area, I rely on the fluorescent depth effect of the EFFECT LINER. During the second dentine firing, I like to work with EFFECT PEARL to implement a lot of brightness in the crown surface.
DV: The case is characterized by natural-looking incisal areas. How did you achieve the very lively play of shade and light?
Marcio Breda: The light must be able to flow through the crown. I achieve this with translucent materials such as the bluish EFFECT ENAMEL 9, opalescent EFFECT OPAL 1, or WINDOW as a counterpart to the shade-intensive EFFECT CHROMAS or the intensely fluorescent MAMELON materials.
DV: What was your goal in applying a highly translucent material to the entire crown geometry in the last step?
Marcio Breda: Based on my experience, with the highly translucent ceramic layer at the end of the veneering process, I can individually control the shade intensity and luminosity of the restoration. The result after the firing shows me if and where I still need to increase or reduce the shade intensity or luminosity.
DV: What should dental technicians pay attention to when processing VITA VM 9 materials in order to achieve reliably reproducible results?
Marcio Breda: There are generally a few parameters to consider here that are not just related to the processing of VITA VM 9. In my experience, care must be taken with the framework structure to ensure that the right material is selected in the right shade. Furthermore, it must be taken into account in the veneering that the respective layer thicknesses have an influence on the light transmission and shade effect. Finally, materials for reflective effects should only be used in the crown body and not on the restoration surface.
DV: What recommendations can you give regarding the firing of VITA VM 9 veneering ceramic?
Marcio Breda: I can make some very general recommendations for this as well. The firing programs recommended by the manufacturer should always be used. I personally always allow the layering result to dry for ten minutes before firing. When veneering, I work with a lot of moisture and use the VITA MODELING FLUID RS for this.
Report 07/19
Marcio Breda, Vitória, Espírito Santo, Brazil
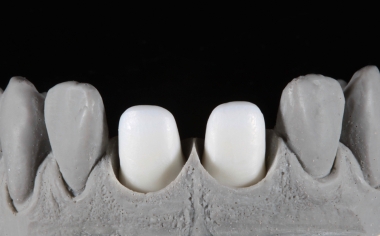
Fig. 1: Framework structures at tooth 11 and 21 made of the zirconia VITA YZ HT.
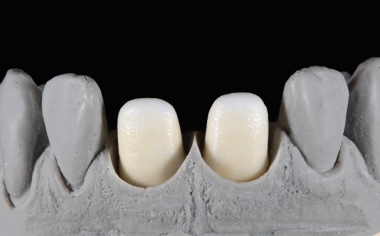
Fig. 2: For the washbake, CHROMA STAINS A was applied and dusted with yellowish EFFECT LINER 4.
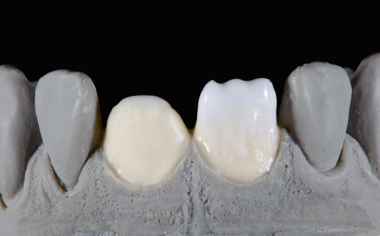
Fig. 3: EFFECT LINER 4 (yellow) was applied in the cervical area and EFFECT LINER 1 (white) in the incisal area as the foundation.
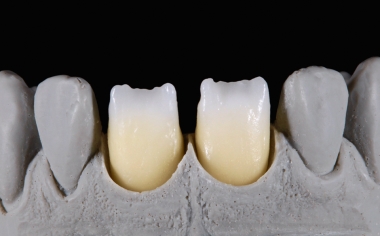
Fig. 4: The shade effect immediately after the effect materials are fired.
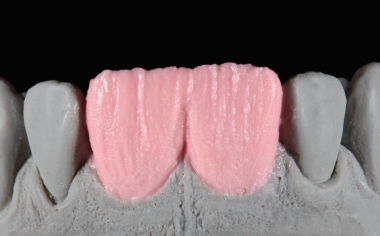
Fig. 5: The dentine core was layered with BASE DENTINE A2.
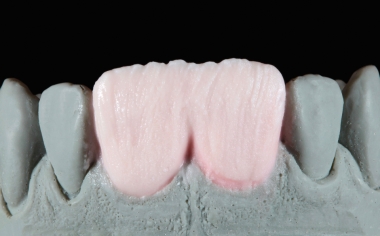
Fig. 6: The dentine core was modified with TRANSPA DENTINE.
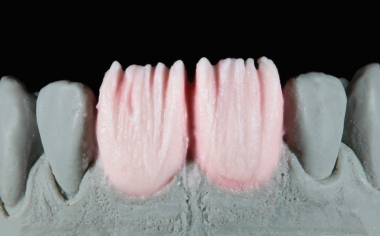
Fig. 7: In order to ensure an incisal light transmission in some places, an anatomical cut-back was used.
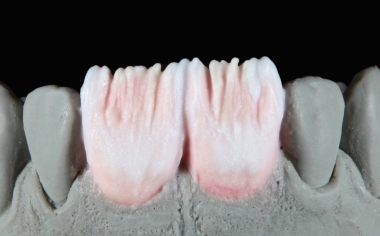
Fig. 8: The application of bluish-translucent EE9 approximally, whitish-translucent EE1 and the light blockade of beige MM1.
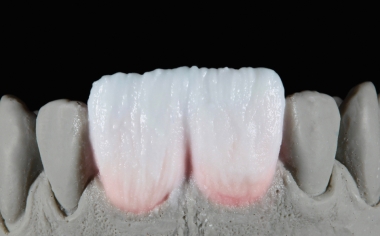
Abb. 9: The crowns were then completely coated with ENAMEL light.
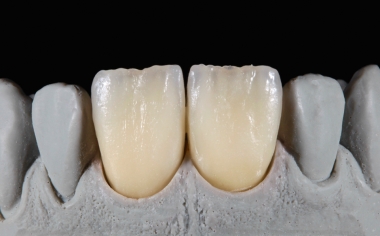
Fig. 10: The interplay between intense shades, fluorescent effects and translucency after firing.
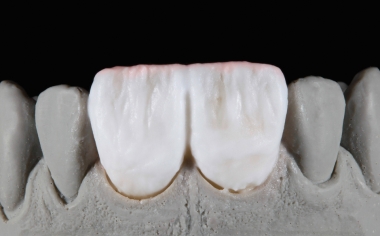
Fig. 11: Layering of EO1, NEUTRAL and WINDOW on the entire surface and characterizations with EFFECT PEARL 1.
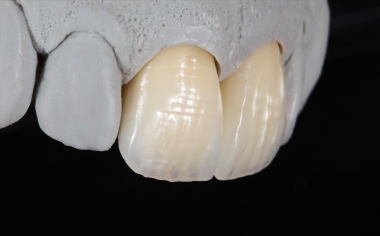
Fig. 12: After the finalization and glazing, the crowns had an absolutely natural effect.
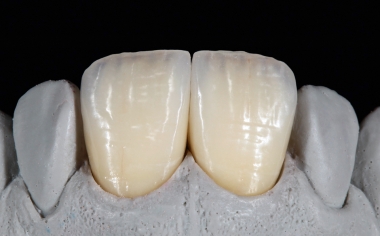
Fig. 13: The lively play of shade and light of the finished restorations.