VITA Zahnfabrik
H. Rauter GmbH & Co. KG
Spitalgasse 3
79713 Bad Säckingen

Monolithic, time-efficient front tooth restoration with the best light dynamics
Often, patients desire time-efficient CAD/CAM restorations that simultaneously feature a natural play of shade and light. This requires materials that are suitable for both monolithic, time-saving CAM-based production and characterized by excellent light dynamics. VITABLOCS TriLuxe forte feldspar ceramic (VITA Zahnfabrik, Bad Säckingen, Germany) is such a material. The third VITABLOCS generation has an integrated, finely nuanced shade and translucency gradient and can be efficiently and precisely processed, thanks to its finely structured ceramic. Using the design software, the restoration can be placed in the virtual blank so that the play of shade and light can be controlled individually for each patient. Dr. Julio Gomez Paris (Rosario, Santa Fe, Argentina) uses the example of a total reconstruction with veneers to show how he was able to to efficiently create a restoration with this polychrome material.
1. Assessment and material selection
A 72-year-old woman came to the practice because she was not satisfied with the esthetic appearance of her teeth. The clinical inspection revealed severely abraded and erosively damaged anterior teeth with exposed root areas. The patient wanted to have the lost hard tooth substance reconstructed while rehabilitating the esthetic zone with veneers. The desired situation was simulated on the computer using patient phots and discussed with the patient. For efficient, natural dental esthetics, VITABLOCS Tri-Luxe forte was chosen as the material.
2. Mock-up and scanning process
The patient was symptom-free from a functional point of view. The habitual intercuspation showed no deviation from the centric condylar position, which is why impressions of the upper and lower jaws were taken, and models were produced and articulated by means of a bite registration. In the articulator, the bite was raised by one millimeter and a functional esthetic wax-up was performed. With a silicone key and temporary composite material (Protemp 4, 3M, Seefeld, Germany), this idealized situation was transferred to the patient’s mouth and a fine adjustment made directly in the patient. The final situation was scanned for virtual construction with the CEREC Omnicam (Dentsply Sirona, Bensheim, Germany). Initially, the posterior region was first treated with crowns and partial crowns made of VITABLOCS TriLuxe forte in the shade 1M2. After the bite had been stabilized in the posterior region, the veneer restoration could be started.
3. Digital construction and production
After local anesthesia, a mock-up guided gingivectomy and controlled preparation were performed. The preparations were scanned and the data record transferred to the inLab CAD software (Dentsply Sirona, Bensheim, Germany). There, the maxillofacial veneers were first designed for the patient based on the mock-up scan and fabricated using the inLab MC X5 grinding unit (Dentsply Sirona, Bensheim, Germany). After finishing with a fine diamond and a rubber polisher, the characterization and the glaze followed with the VITA AKZENT Plus stain system.
4. Final result: total reconstruction
After a successful try-in, the veneers were conditioned with hydrofluoric acid and silane. The preparations were etched with phosphoric acid, and the universal adhesive Scotchbond Universal was applied. Adhesive attachment was carried out with RelyX Veneer (both 3M, Seefeld, Germany). The restoration of the lower jaw incisors was done in the same manner. The patient was very satisfied with the efficient and highly esthetic result. To relieve the stomatognathic system and to protect the restoration, a front canine-guided splint was additionally made for the night. At a follow-up after one and a half years, absolutely stable conditions were found.
Report 07/19
Dr. Julio Gomez Paris, Santa Fe, Argentina
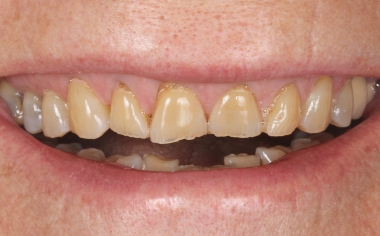
Fig. 1: Initial situation: Due to abrasion and erosion, an irregular contour of the incisors had developed.
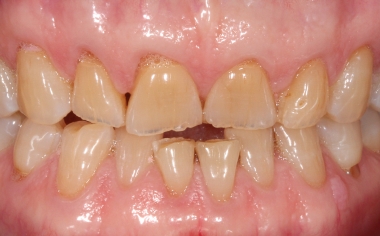
Fig. 2: Multiple recessions had led to an uneven alignment in the gingival garlands.
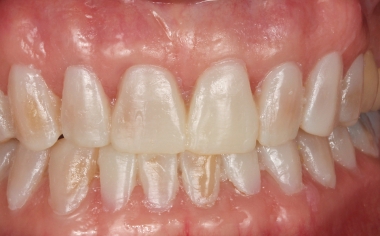
Fig. 3: The functional-esthetic mock-up was transferred with a silicone key.
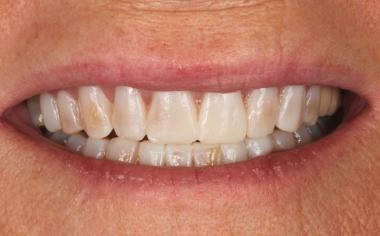
Fig. 4: The composite mock-up during the check of the dynamic protrusion.
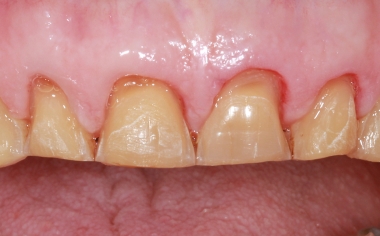
Fig. 5: After prosthetic stabilization of the posterior region, the mock-up was prepared.
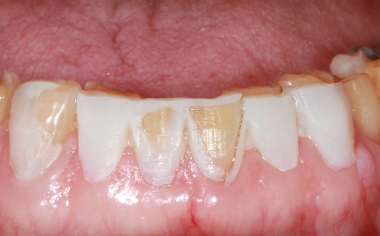
Fig. 6: The substance was removed in a controlled manner and as minimally invasive as possible.
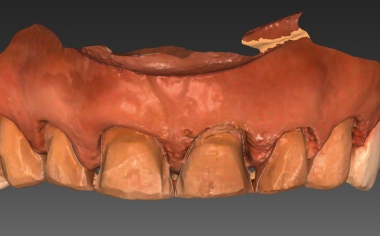
Fig. 7: The scanned preparation in the upper jaw in the CAD software.
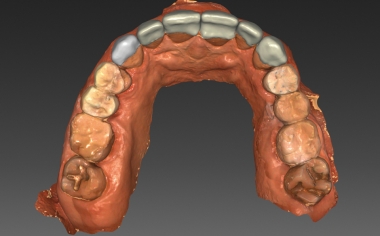
Fig. 8: The virtual construction of the upper jaw veneers from VITABLOCS TriLuxe forte.
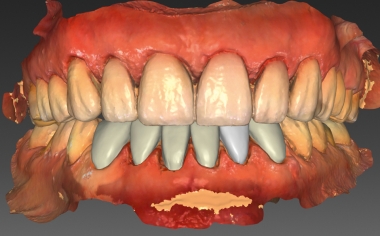
Fig. 9: The virtual construction of the veneers in the lower jaw.
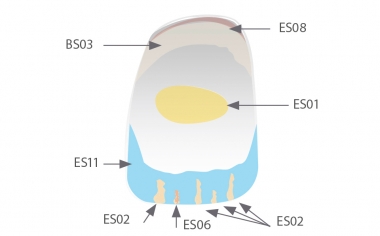
Fig. 10: Characterization was done using the stain system VITA AKZENT Plus.
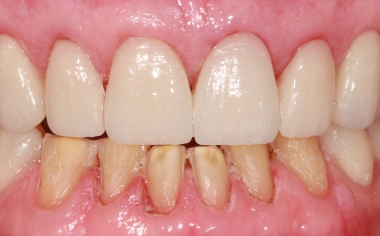
Fig. 11: The veneers produced with CAD/CAM support in the upper jaw immediately after adhesive integration.
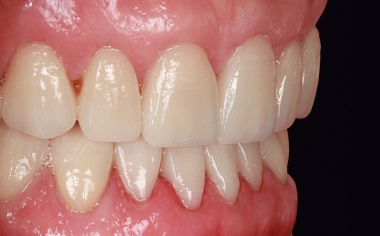
Fig. 12: The veneers in the lower jaw directly after the adhesive integration.
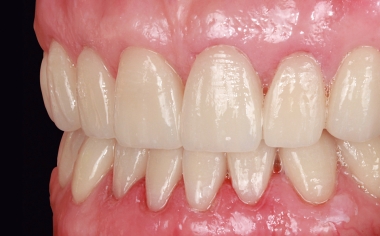
Fig. 13: In the upper jaw, the gingivectomized areas were already healed.
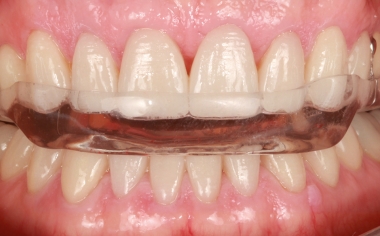
Fig. 14: A front canine-led splint was integrated after the total reconstruction.
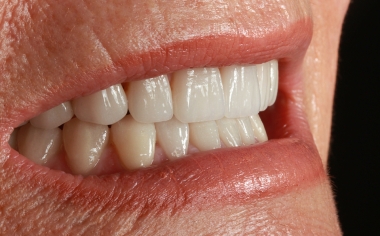
Fig. 15: After one and a half years, the conditions were absolutely stable.
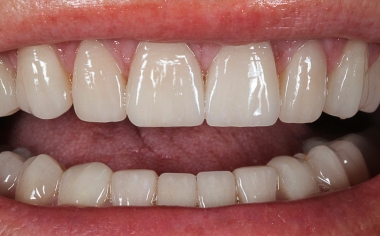
Fig. 16: The incisal edges harmonized with the curve of the lips.
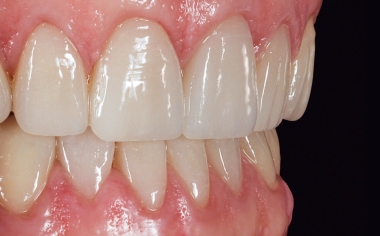
Fig. 17: The efficiently fabricated veneers appeared absolutely natural.
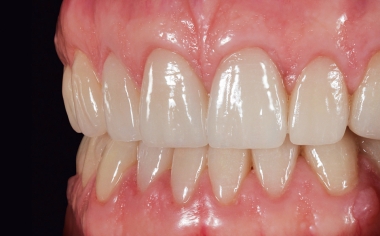
Fig. 18: The excellent light dynamics of the material enables a highly esthetic result.