
Implant-supported polychrome crown reconstruction of hybrid ceramic
Restorations and implants are exposed to especially high loads. After extraction and implantation, the patient lacks the elastic fiber apparatus of the natural dental bed. As a result, chewing forces are not absorbed, but transmitted directly to the restoration, the implant, the bone and the opposing dentition. The hybrid ceramic VITA ENAMIC (VITA Zahnfabrik, Bad Säckingen, Germany) provides a dual network structure of ceramic (86 wt%) and polymer (14 wt%). This results in a dentin-like elasticity and the ability to absorb chewing forces. Due to its high vertical dimension, the polychrome blank VITA ENAMIC multiColor in the EMC-16 geometry enables the production of one-piece, monolithic abutment crowns, even with atrophied bone. In the following article, dentist Professor Dr. Alexander Hassel (Mannheim, Germany) demonstrates how he provides a patient with this type of restoration.
1. Initial Situation
A 53-year-old female patient came to the dental office because of bite problems. Radiologically and clinically, a root fracture was diagnosed on endodontically treated tooth 26. The tooth was then extracted in a bone-preserving manner. Since the patient rejected a removable denture and an invasive bridge preparation on teeth 25 and 27, it was decided to close the gap with an implanted restoration. An earlier periodontitis was treated in the patient, and the treatment result was stabilized with a close prophylaxis. In region 26, the jawbone was atrophied, which is why the VITA ENAMIC multiColor polychrome hybrid ceramic blank in EMC-16 geometry was selected for the patient’s CAD/CAM-supported restoration.
2. Implantation and impression
An OsseoSpeed EV implant (Dentsply Sirona, Mannheim, Germany) was inserted in region 26, and an open impression could be taken after a healing period of three months. For taking an impression with Impregum (3M, Seefeld, Germany), a VITA disposable impression tray was perforated specifically in the area of the implant. On this basis, a master model was produced and digitized in the laboratory scanner inEos X5 (Dentsply Sirona, Bensheim, Germany). The crown could now be designed with the exocad software (exocad, Darmstadt, Germany). An abutment crown with integrated screw channel was designed to match the individual abutment and the screw channel diameter.
3. Fabrication of an abutment crown
The milling unit N4 (vhf camfacture, Ammerbuch, Germany) was used to grind out the abutment crown wet. The individual abutment was sandblasted prior to adhesive bonding and conditioned with a metal primer. The adhesive surfaces and the screw channel of the abutment crown were etched with hydrofluoric acid and then silanized. The cement gap and the abutment crown were finalized and polished under an air block after the composite cement had hardened. The prosthetic implant restoration was then screwed in intraorally, and the approximal contacts and occlusion were checked. After the insertion of Teflon tape, the screw channel could be adhesively closed with filling composite.
4. Time-efficient, esthetic result
Thanks to the high vertical dimension of the VITA ENAMIC multiColor EMC-16 blank and the excellent CAM processing properties of hybrid ceramics, an esthetic abutment crown was efficiently fabricated with CAD/CAM support despite the presence of bone atrophy in region 26. A monolithic restoration can significantly reduce the risk of chipping. Furthermore, laboratory tests show that the dual network structure of hybrid ceramics allows them to stop an initial crack formation that could potentially occur. This suggests good long-term clinical stability. The external bonding prevents cement residues in the sulcus and prevents peri-implantitis. At the follow-up after one week, the patient was enthusiastic about the natural chewing sensation and the lifelike appearance of the hybrid ceramic restoration. The inspection revealed an inflammation-free, esthetically shaped gingiva and a natural play of shade and light for the polychrome hybrid ceramic crown.
Report 07/19
Prof. Dr. Alexander Hassel, Mannheim, Germany
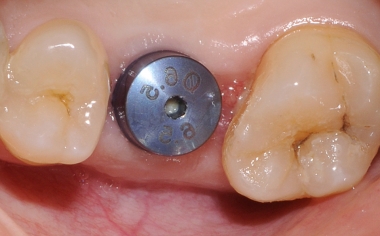
Fig. 1: Initial situation: The implant at 26 after a healing period of three months.
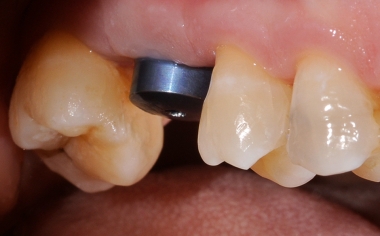
Fig. 2: The soft tissue conditions around the gingiva former were stable and inflammation-free.
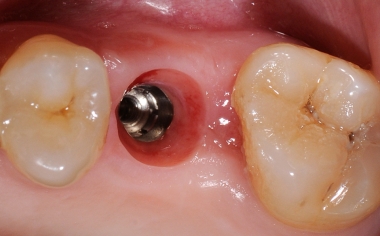
Fig. 3: After the gingiva former was unscrewed, the shaped emergence profile was revealed.
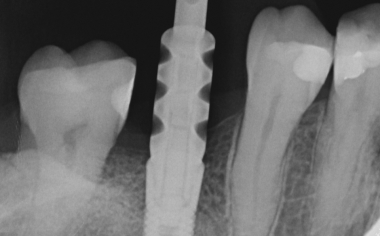
Fig. 4: The osseointegrated implant with screw-on impression post.
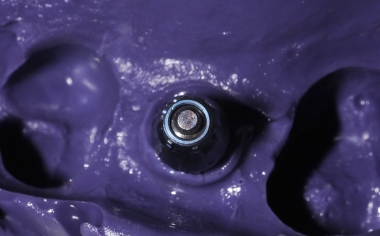
Fig. 5: The fixation impression was done openly with a perforated tray.
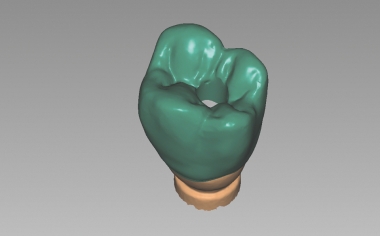
Fig. 6: An abutment crown with screw channel was designed using CAD software.
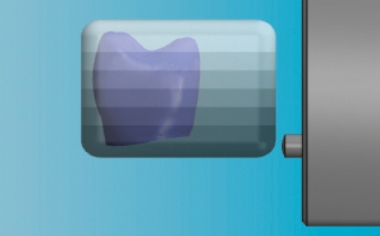
Fig. 7: The shade gradient could be controlled in a targeted manner by vertically positioning the crown in the virtual blank.
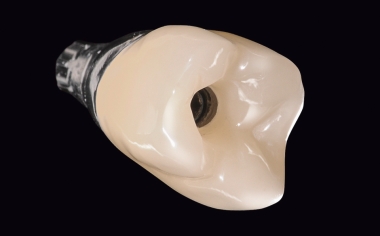
Fig. 8: The abutment crown adhesively attached to the individual abutment.
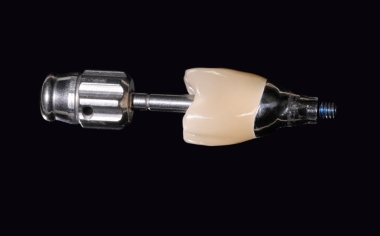
Fig. 9: The abutment crown can be screwed in intraorally via the screw channel.
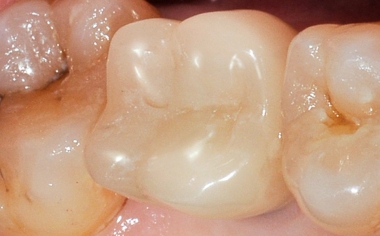
Fig. 10: After insertion, the screw channel was closed with composite.
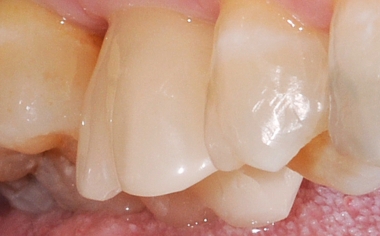
Fig. 11: Result: The abutment crown is harmoniously integrated into the remaining natural dentition.