
CAD/CAM fabricated anterior crown made of glass ceramic with a natural play of shade and light
Single tooth reconstructions located in the esthetic zone pose one of the greatest challenges to dental professionals. For optimal reproduction of the multifaceted play of colors and light of natural teeth, several requirements must be met. These include collecting comprehensive and precise tooth shade information, as well as using CAD/CAM material that has both high shade fidelity and excellent light dynamics. In the following case study, Master Dental Technician Marcio Breda and Dentist Dr. Glauco Rangel Zanetti (both: Vitória, Espírito Santo, Brazil) show how they were able to efficiently and esthetically implement an anterior restoration using the high-strength glass ceramic VITA SUPRINITY PC and the veneering ceramic VITA VM 11 (both VITA Zahnfabrik, Bad Säckingen, Germany).
1. The patient case
A 24-year-old female patient had suffered trauma on tooth 11. After a successful root canal procedure, the fractured crown was stabilized using direct composite. Since the osseous growth was now complete, the patient requested a final permanent restoration that met her esthetic expectations, including her youthful tooth anatomy. For efficient production, the zirconia-reinforced lithium silicate ceramic VITA SUPRINITY PC was selected for the crown using CAD/CAM fabrication, with a slight individualization using VITA VM 11 veneering ceramic.
2. Clinical steps and CAD/CAM
After the tooth shade was determined using the VITA classical A1-D4 shade guide, the decision was made to use a blank with the tooth shade A1 and translucency level T. After local anesthesia was applied, a full crown preparation was performed on tooth 11 and a retraction thread was inserted into the sulcus. The impression for the master model was created using A-silicone. The model was digitized using the Ceramill Map 400+ laboratory scanner, and the design was then realized using the Ceramill Mind CAD software. Finally, the anterior crown could be ground out of the VITA SUPRINITY PC blank in the Ceramill Motion 2 (all by Amann Girrbach, Pforzheim, Germany).
3. Esthetic finalization
The manual reworking and anatomical reduction of the incisal area were carried out using fine diamond instruments and rubber polishers. Incisal individualization of the crown was performed using BASE DENTINE A1, ENAMEL light and bluish-translucent EFFECT ENAMEL (EE9). After the firing, the morphology and surface texture were finalized using diamond polishers. Once the final glazing using VITA AKZENT PLUS GLAZE LT was complete, the crown was ready for the clinical try-in.
4. Fully-adhesive bonding and results
Dentist, dental technician and patient were all extremely satisfied with the esthetic appearance, and a fully-adhesive bond could be applied to the crown using composite cement, after hydrofluoric acid etching and silanization of the lumen. “The patient had very light teeth with pronounced opalescence. In reproducing these properties, the VITA VM 11 veneering ceramic and the VITA SUPRINITY PC glass ceramic harmonized perfectly with each other,” explained Marco Breda, impressed by the interaction between the two ceramic materials.
Report 04/20

Master Dental Technician Marcio Breda Vitória, Espírito Santo, Brazil
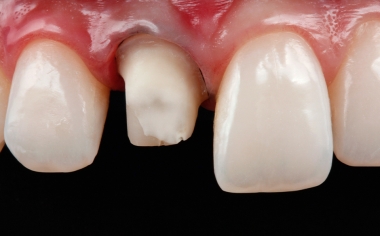
Fig. 1 Tooth 11 was prepared for a final permanent restoration with a full crown.
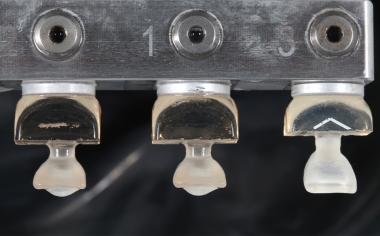
Fig. 2 The CAD/CAM-fabricated crown in the middle immediately after the milling.
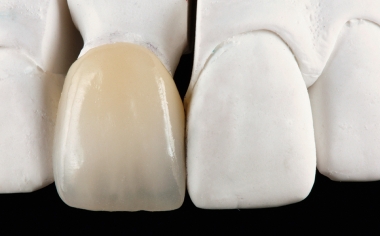
Fig. 3 After finishing and minimal cut-back, the crown was individualized incisally with VITA VM 11.
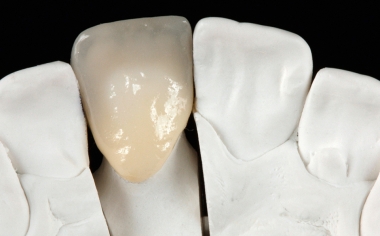
Fig. 4 Palatal view of the finished crown on the model.
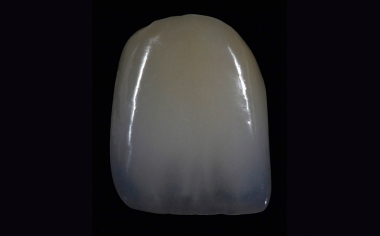
Fig. 5 Depending on the exposure the crown shows ...
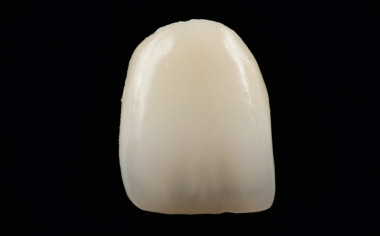
Fig. 6 ...a different....
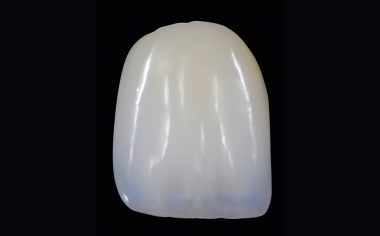
Fig. 7 ....play of color and light.
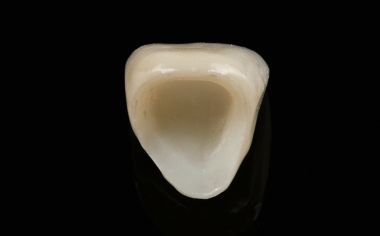
Fig. 8 View into the crown lumen with hydrofluoric acid and silane for a fully adhesive fixation.
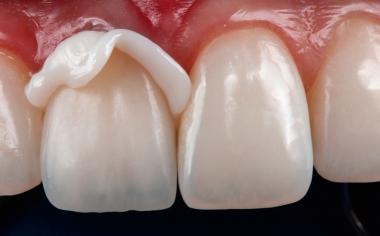
Fig. 9 The crown with full adhesion applied before removing the excess composite.
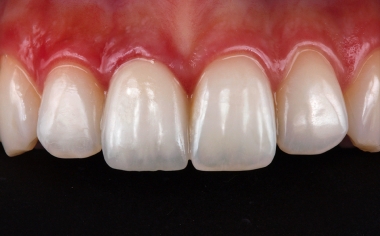
RESULT The crown integrated harmoniously into the dental arch and showed a highly esthetic play of color and light.