
Complex, cosmetic reconstruction of the front using VITA VMK MASTER ceramic
Cosmetic restoration of the esthetic zone is always associated with a number of different technical challenges. In order to successfully reproduce the natural play of form, color and light in a patient-specific, age-appropriate manner, meticulous esthetic planning is a key component. It is possible to achieve highly predictable treatment results with great teamwork between practitioners and technicians, and with the involvement of the patient. In the following, Dentist Dr. Alexandre Richard (Lausanne, Switzerland) and Dental Technician Xavier Bosson (Châtel-Saint-Denis, Switzerland), show how working together as a dentist and dental technician team helped them successfully achieve the complex, cosmetic restoration of an anterior upper jaw with veneers made of VITA VMK MASTER ceramic (VITA Zahnfabrik, Bad Säckingen, Germany) using comprehensive analog and digital planning.
1. A patient with high expectations
A 27-year-old patient, who is a dental technician, was dissatisfied with the color and shape of his upper front teeth, and wanted a cosmetic restoration using veneers. Due to his professional background, his esthetic expectations were naturally high. Clinically, there was an uneven incisal edge and faint white spots. According to the patient, he grinded his teeth in his sleep. Grinding marks were visible. Clinically, no interfering contacts could be diagnosed. The patient did not experience any discomfort. To reconstruct the appearance of the esthetic zone and the anterior cuspid guidance in a patient-specific manner, the dentist and dental technician decided to use individually layered veneers.
2. Analog and virtual planning
Using the Smile Designer Pro app (Tasty Tech, Toronto, Ontario, Canada) and portrait photos, the restoration of 15 to 25 was digitally constructed, according to the established concepts of Smile Design. Based on anatomic impressions, models were fabricated and then articulated for a wax-up. After a final discussion on the wax-up, it could be transferred intra-orally using a silicone key and temporary composite (Protemp 4, 3M Aspen, Seefeld, Germany). After some minor additive and subtractive optimizations, the patient was satisfied and a mould was made of the final situation.
3. Preparation and layering
Before preparations, the tooth shade 1M1 was determined using the VITA SYSTEM 3D-MASTER shade guide. The mock-up preparation then followed. After the impression was taken, a temporary restoration was fabricated using the spot-etch technique. The ten veneers were created on a fabricated master model using the platinum foil technique from the veneering ceramic VITA VMK MASTER. The dentin section was reproduced with fluorescent LUMINARY 1 (white) and DENTINE 1M1. The internal characterizations were carried out using VITA INTERNO Stains 01 (white) and 02 (sand). The enamel portion could be achieved using alternating layers of TRANSLUCENT 1 (whitish), 2 (yellowish-brownish), 4 (neutral) and 5 (light blue), as well as neutral OPAL TRANSLUCENT 1 and whitish ENAMEL 1.
4. Fixing and highly esthetic results
During the clinical try-in of the finished veneers, the contours of the cuspids were given a more bulbous shape using composite. The space between the cuspids and the lateral incisors was closed in the same manner. This gave the dental technician an accurate indication of the requested corrections. After the correction firing, the final incorporation of the surface texture and the high-gloss polishing, the veneers could be cemented using dual-curing composite cement after hydrofluoric acid etching and silanization. Using veneers made of VITA VMK MASTER ceramic, a highly esthetic appearance could be achieved in terms of shape and color. The lips and incisal edges harmonized well with each other. The patient expressed his great satisfaction with the final results of the cosmetic reconstruction with a relaxed smile.
Report 04/20

Dentist Dr. Alexandre Richard Lausanne, Switzerland and
Dental Technician Xavier Bosson Châtel-Saint-Denis, Switzerland
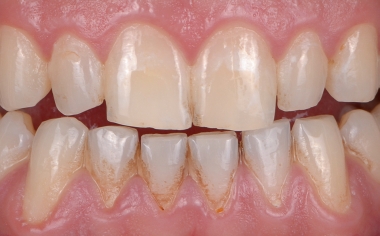
INITIAL SITUATION The incisal edge was very uneven.
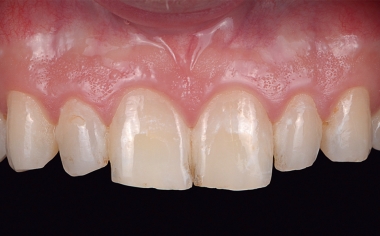
Fig. 2 The tooth shade and white spots disturbed the patient.
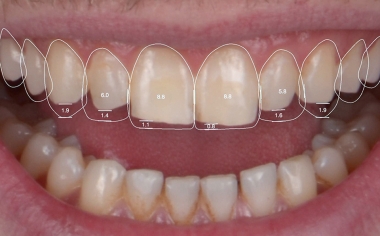
Fig. 3 Using an app, the tooth proportions could be changed virtually.
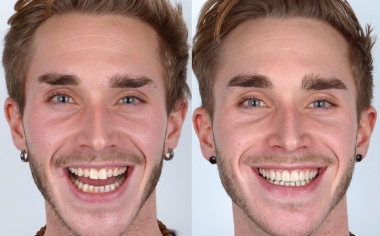
Fig. 4 The virtual before/after provided the initial guidelines.
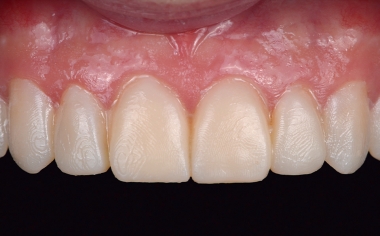
Fig. 5 With the help of a wax-up, a direct mock-up was prepared.
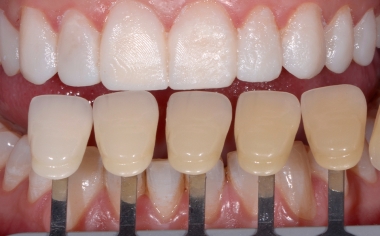
Fig. 6 The tooth shade was determined using the VITA SYSTEM 3D-MASTER.
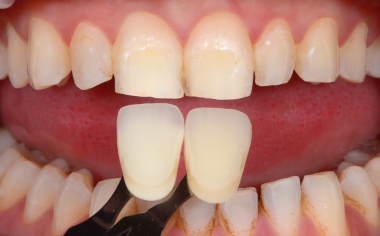
Fig. 7 Images taken with a polarizing filter show the shade nuances.
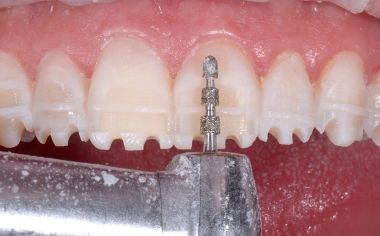
Fig. 8 A controlled mock-up preparation allowed for a minimally invasive procedure.
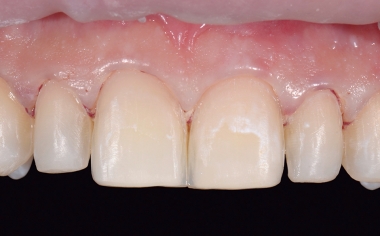
Fig. 9 The clinical situation after minimal tooth substance removal and with slight tapering.
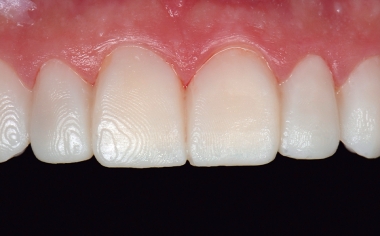
Fig. 10 The provisional solution corresponded to the mock-up.
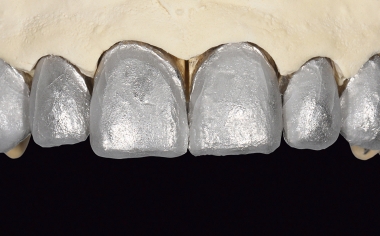
Fig. 11 The master model with platinum foil on the stumps.
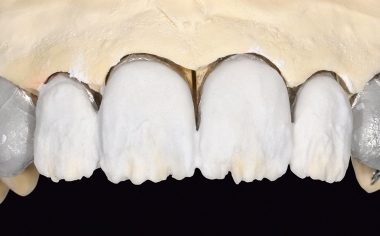
Fig. 12 The dentin section was layered with LUMINARY 1 (white) and DENTINE 1M1.
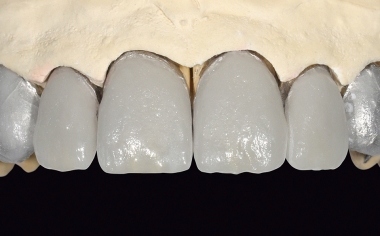
Fig. 13 The result of the layering after firing.
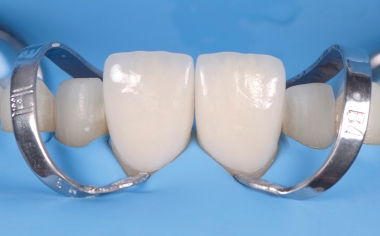
Fig. 14 The final try-in of the veneers on teeth 11 and 21.
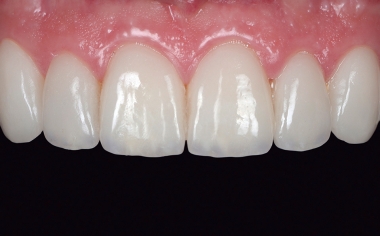
Fig. 15 The clinical situation after six weeks. The papillae showed complete regeneration.
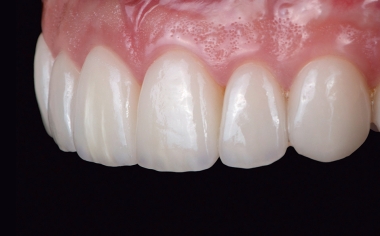
Fig. 16 The veneers showed a highly esthetic appearance in terms of shape and color.
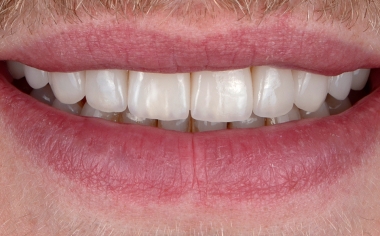
RESULT The patient was delighted with his new smile. The lips and incisal edges harmonized with each other.