
Youthful, Lifelike Reconstruction of the Anterior Region
Reconstructing a single, juvenile anterior tooth is challenging for any dental technician. It is important to reproduce the natural play of shade and light with all their multi-faceted nuances in order to achieve highly esthetic results with natural light dynamics. A veneering porcelain system needs to offer a wide range of shade nuances to allow dental technicians to create individualized and lifelike restorations that integrate very well with the neighboring teeth. In the following case, dental technician Marcio Breda describes how he treated the esthetic zone with an all-ceramic crown and a non-prep veneer made from feldspar veneering porcelain VITA VM 9 (VITA Zahnfabrik, Bad Säckingen, Germany).
1. Initial clinical situation
A 27-year-old female patient visited the dental office of Dr. Vitor Padilha de Menezes because she was not satisfied with the esthetic appearance of her middle right incisor in the upper jaw. After a trauma, the tooth had been treated with an all-ceramic crown. The morphology and the photo-optical appearance did not match the neighboring natural teeth. The locally inflamed and irritated gums indicated an insufficient crown margin. The radiographic examination showed a sufficient root canal treatment. For the dentist and dental technician, the aim was to symmetrize the morphology of the two central incisors and to reproduce the tooth shade and individual effects of the neighboring teeth. A non-prep veneer on tooth 21 and an all-ceramic crown on 11 from VITA VM 9 were planned accordingly.
2. Systematic tooth shade determination
In order to precisely reproduce the natural tooth structure, the tooth shade was determined using the VITA Toothguide 3D-MASTER. In three steps, the brightness, color saturation and shade were determined. In this case, the shade identified was between 1M1 and 1M2. After applying local anesthesia, the old crown was removed and the preparation was optimized. An analogue impression was taken and a master model was created. A mesial wax-up on tooth 21 was created to visualize the ideal morphology. The model was scanned and a zirconia substructure for tooth 11 was constructed and fabricated using a digital workflow. After sintering, preparation and regeneration firing, the substructure was ready for veneering with VITA VM 9.
3. Veneering
To integrate warm, fluorescent shades into the crown, a wash firing was performed with VITA AKZENT Plus GLAZE PASTE and applied to VITA VM 9 EFFECT LINER 2 (beige). The dentine core was then successively reproduced in two steps with BASE DENTINE 1M2 and 1M1. After an anatomical cut-back, incisal EFFECT CHROMA 2 (sand beige) was applied. EFFECT OPAL 3 (bluish) was layered mesially and distally in the upper third of the crown. To complete the enamel layering, a mixture of ENAMEL (ENL) and NEUTRAL was added at a ratio of 2:1. After the first dentine firing, the crown was finished with a corrective firing. The restoration was finished with a fine diamond- and a rubber polisher. On a second master model with a refractory stump on tooth 21, the non-prep veneer was prepared using VITA VM 9.
4. Highly esthetic results
To create a natural appearance, the restorations were characterized with VITA AKZENT Plus EFFECT STAINS 01 (white) and 02 (cream) and fixed with a firing. Finally, the glaze firing was performed with VITA AKZENT Plus GLAZE. After the clinical try-in, the non-prep veneer and the crown were fastened with adhesive. The dental arch in the esthetic zone was harmonized with the two different, all-ceramic treatment types and showed a natural play of shade and light. The restorations reproduced all the nuances of the neighboring teeth and integrated themselves harmoniously. The young patient was very happy with the results. Her laughter showed her increased self-confidence after the treatment.
Report 11/18
DT Marcio Breda, Vitória, Espírito Santo, Brazil
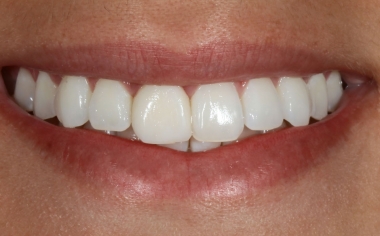
Fig. 1: The initial situation with morphological deficits and asymmetries in the esthetic zone.
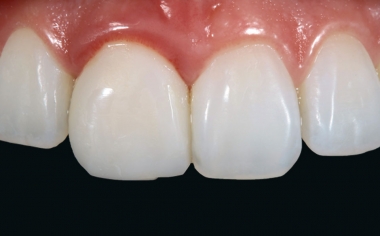
Fig. 2: The crown on tooth 11 was lifeless, showing no photo-optical effects.
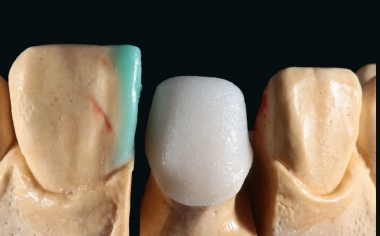
Fig. 3: A CAD/CAM-based zirconia substructure was created.
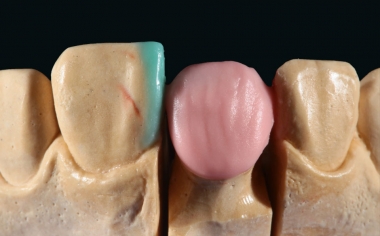
Fig. 4: The dentine core was first coated with VITA VM 9 BASE DENTINE 1M2.
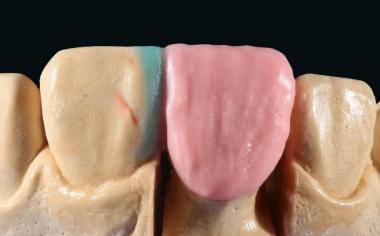
Fig. 5: To complete the dentine body, layering was added using BASE DENTINE 1M1.
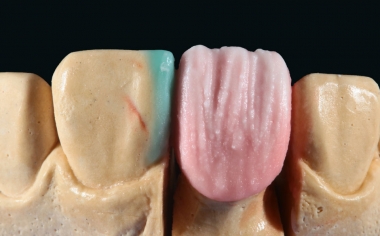
Fig. 6: After the anatomical cut-back, EFFECT CHROMA 2 (sand beige) was applied to the incisal area.
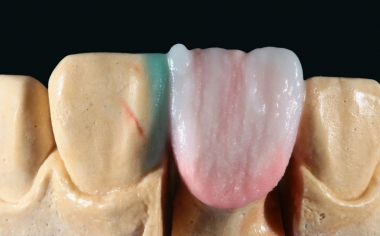
Fig. 7: EFFECT OPAL 3 (bluish) was layered mesially and distally in the upper third of the crown.
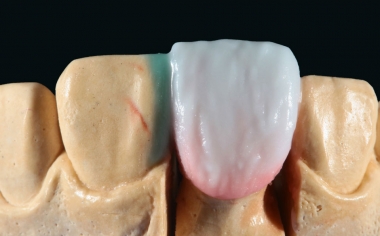
Fig. 8: To complete the enamel layer, a 2:1 mixture of ENAMEL (ENL) and NEUTRAL was added.
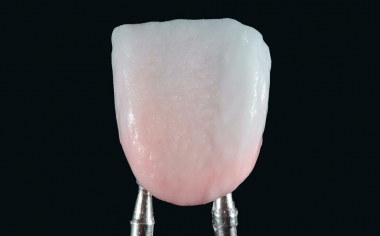
Fig. 9: The crown was carefully removed from the master model and the proximal areas were completed.
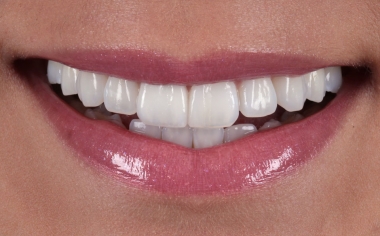
Fig. 10: The dental arch harmonized with the curve of the lips.
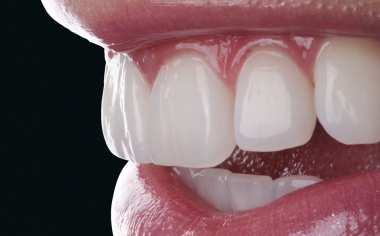
Fig. 11: The morphology and texture of the restorations were very natural.
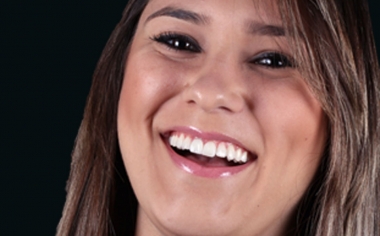
Fig. 12: Result: The patient was very satisfied with the final results of the treatment.